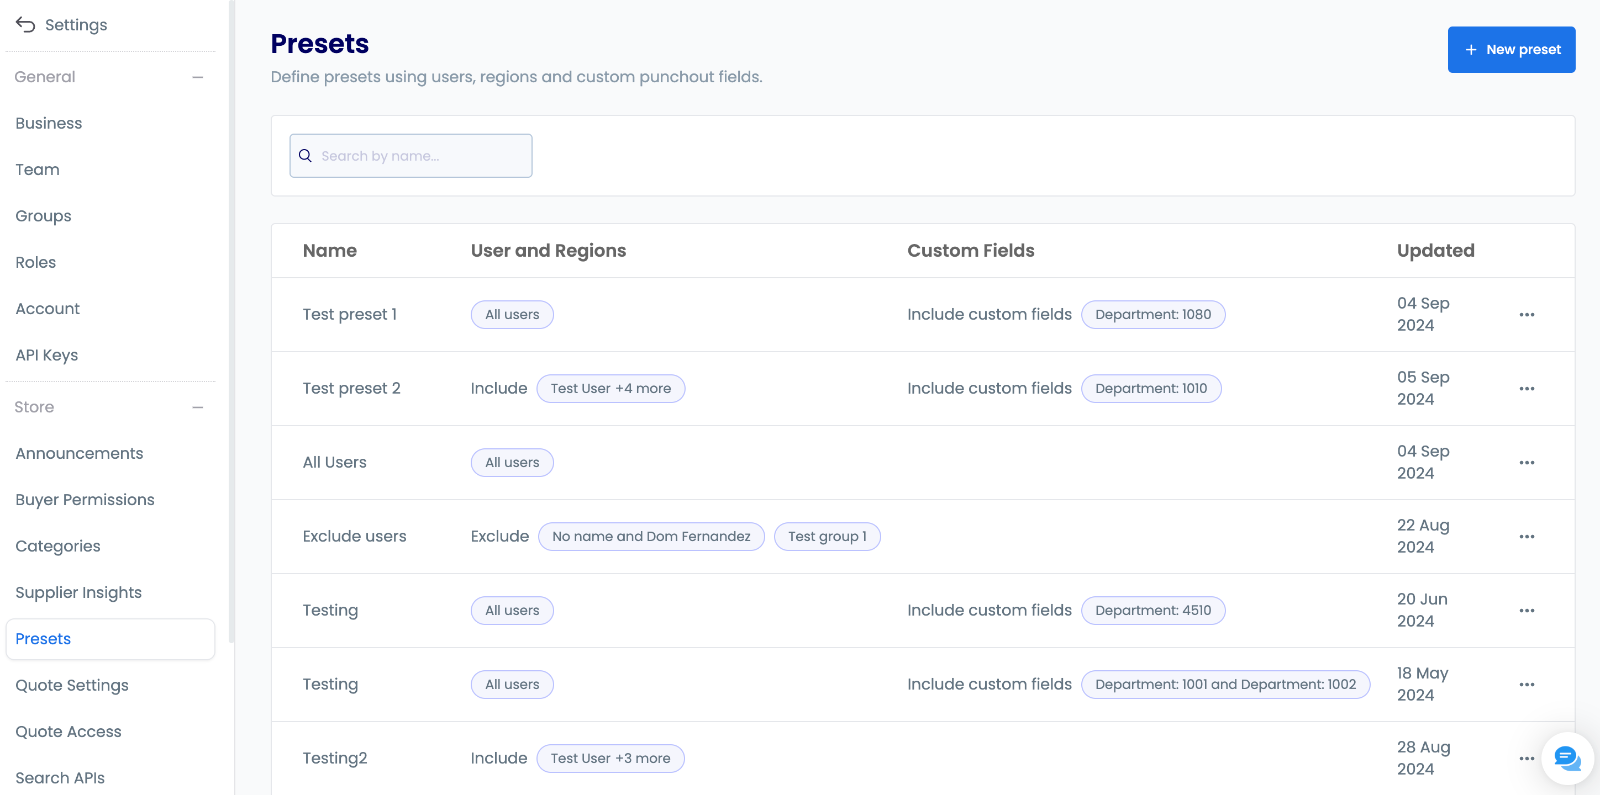
Presets
Using the Presets feature of the procurement platform.
Summary
Presets are reusable configuration templates that define which users rules apply to. They can be configured using specific users/groups, regions, or custom fields from punchout settings.
Presets are selected in the Apply to field when configuring buyer permissions, punchout details, or category supplier configs. All presets can be managed on the Presets page under Settings.
Creating Presets
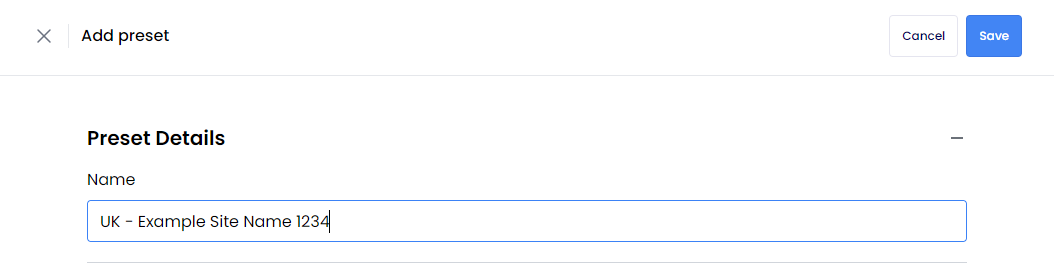
To create a new preset from the Presets page under Settings:
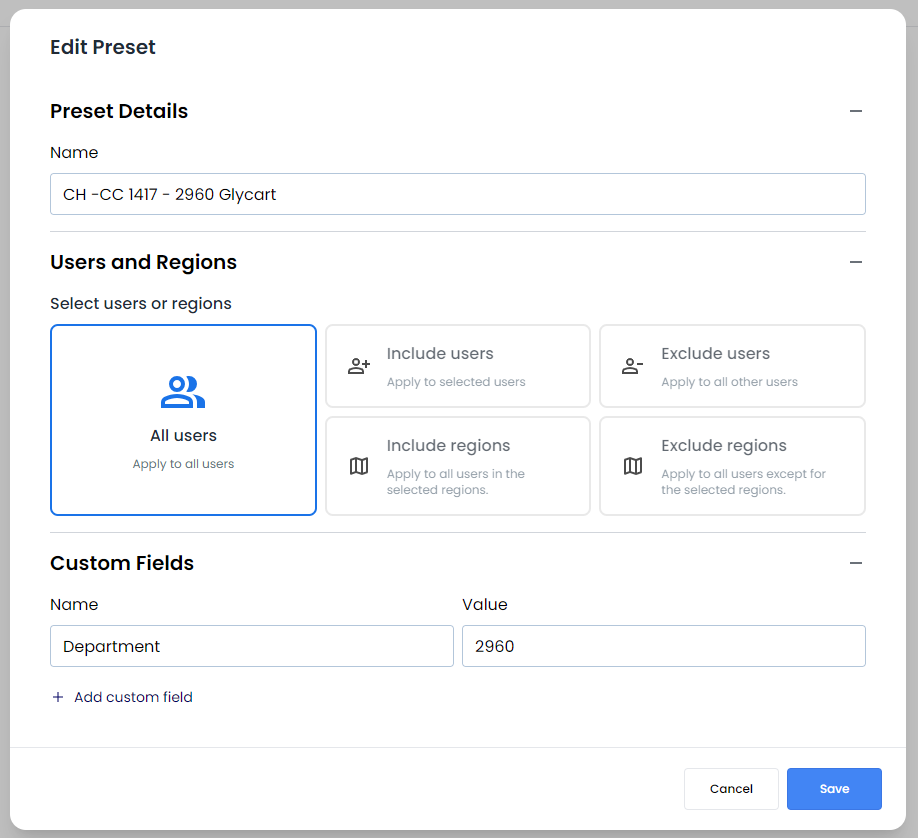
- Click + New preset
- Give the preset an appropriate name for internal reference and ease of management
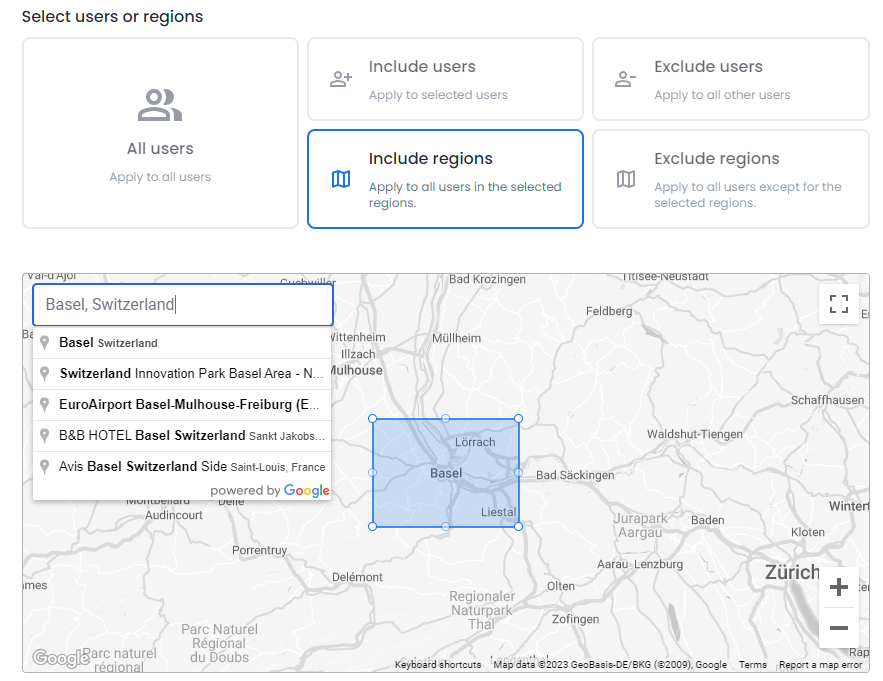
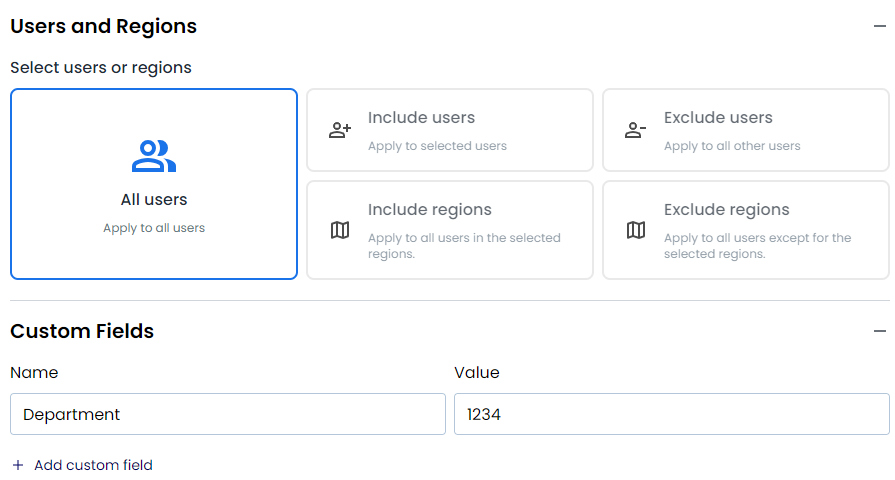
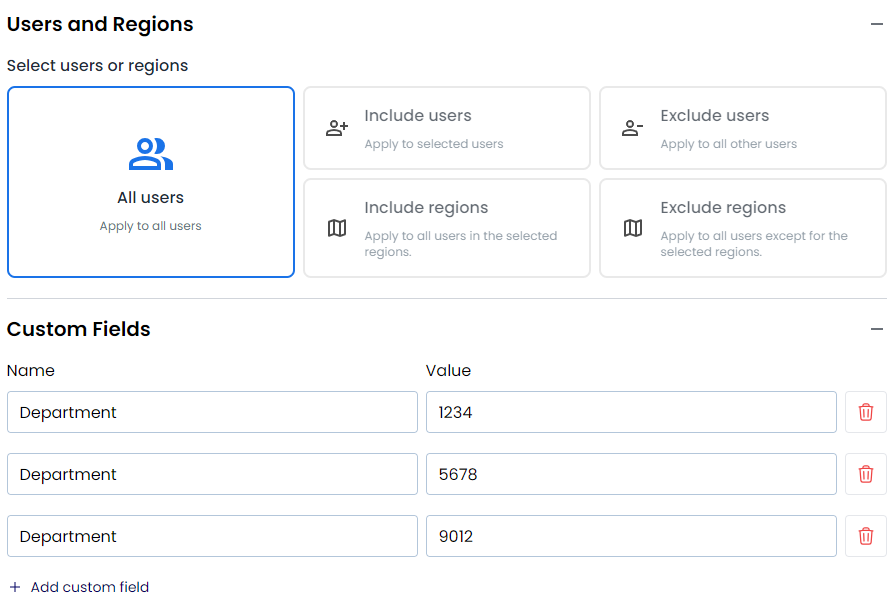
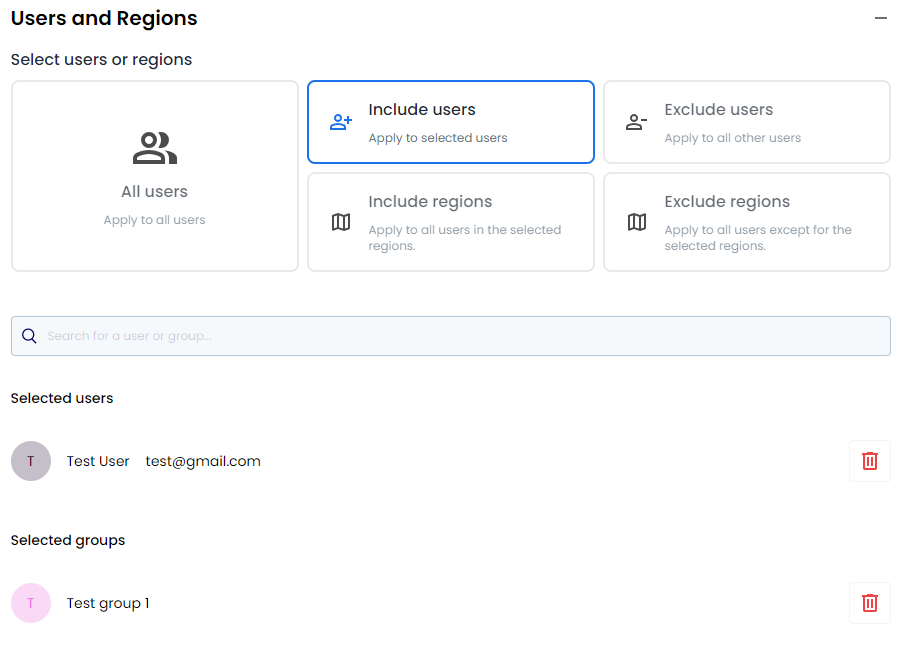
- Specify which users to include in the preset by selecting an option in Users and Regions:
- All users
- Include specific users/groups
- Exclude specific users/groups (includes all other users)
- Include users in specific regions (based on delivery address)
- Exclude users in specific regions (based on delivery address - includes all other users)
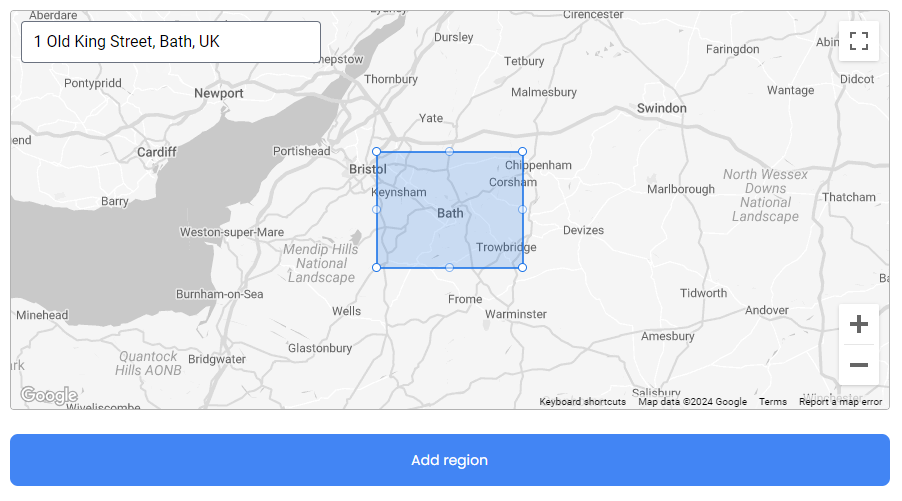
Configuring Regions
If including/excluding regions:
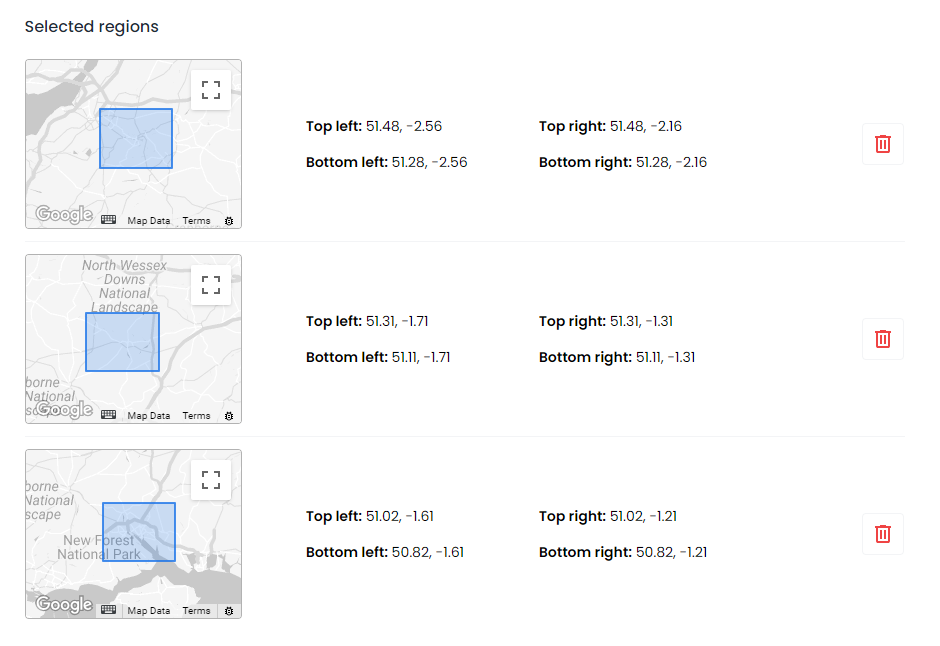
- Resize and move the rectangle on the map to select geographic regions
- Search for and select an address/location to center the map on an area
- Click "Add Region" to add each desired area to the selected regions list
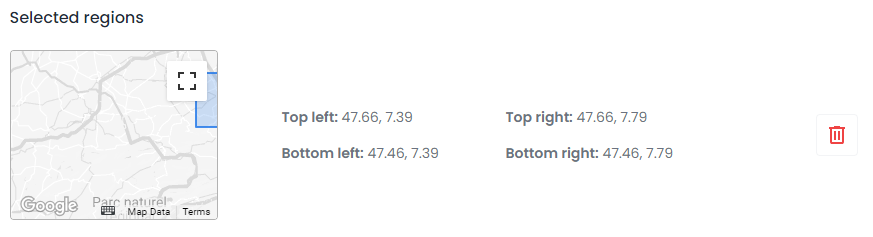
- Specify multiple regions as needed
- Remove regions with the trash icon
Adding Custom Fields
Add any Custom Fields included in the punchout setup to further specify users:
-
Enter the name of the field from the punchout setup settings
-
Enter the specific value for the field
-
Add further fields with the same name or otherwise by selecting
+ Add custom field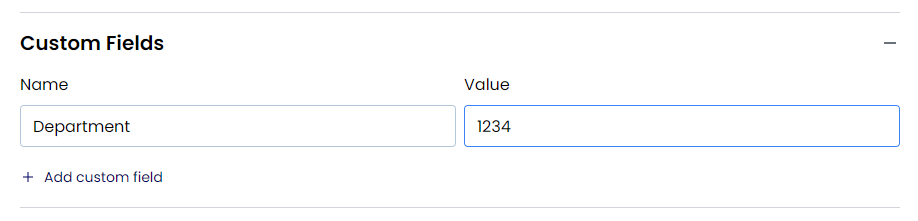
-
Review and click Save in the top-right to create the preset
If multiple custom fields are selected, a user's punchout settings will only have to include at least one of them, and not all of them, to be included in the preset. The user will also have to be included in the Users and Regions section, either via All Users or otherwise.
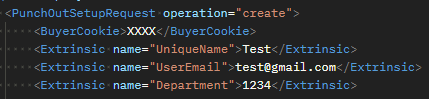
Custom fields are labelled as extrinsic fields within a punchout setup request, for example: <Extrinsic name="Department">1234</Extrinsic>
When entering a custom field based on this example, the Name field would be Department and the Value field would be 1234.
Common Examples
All Users of a Department
To apply rules to all users of a specific company department/site/entity (using extrinsic field Department).
- Select All Users in the Users and Regions section
- Add a custom field with
Departmentas the Name and the appropriate value (e.g.1234) as the Value
All Users of Several Departments
To apply rules to multiple company departments/sites/entities (using extrinsic field Department).
- Select All Users in the Users and Regions section
- Add custom fields with
Departmentas the Name and appropriate values for each department (e.g.1234,5678)
Specific Users
To apply rules to specific users:
- Select the appropriate users in the Users and Regions section (e.g. by including users/user groups)
Specific Users of a Department
To apply rules to specific users for a specific department/site/entity (using extrinsic field Department).
- Select the appropriate users in the Users and Regions section
- Add a custom field with
Departmentas the Name and the appropriate value (e.g.1234) as the Value

All Users of Specific Delivery Addresses/Locations
To apply rules to all users of specific punchout delivery addresses/locations:
- Select Include Regions and search for the delivery address in the Users and Regions section
- Adjust the rectangle size to include only intended addresses
- Select Add Region
To include multiple delivery addresses/locations, increase the rectangle size or add multiple different regions.
Managing Presets
Managing Presets from the Presets Page
Once created, presets can be edited or deleted from the Presets page.
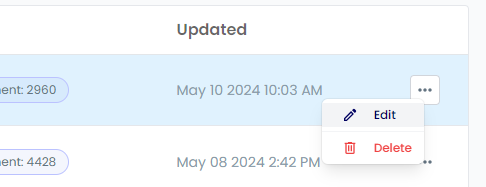
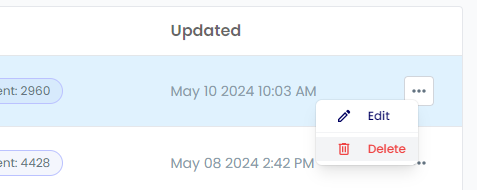
To manage existing presets on the Presets page:
- Click Edit in a row menu dropdown or click on the table row itself to modify a preset
- Click Delete in a row menu dropdown to permanently delete a preset
- Click + New preset to create additional presets
If a preset is deleted that is being used in any rules such as buyer permissions, then those rules will also be deleted. A warning will be presented with the affected rules along with the options to confirm or cancel.


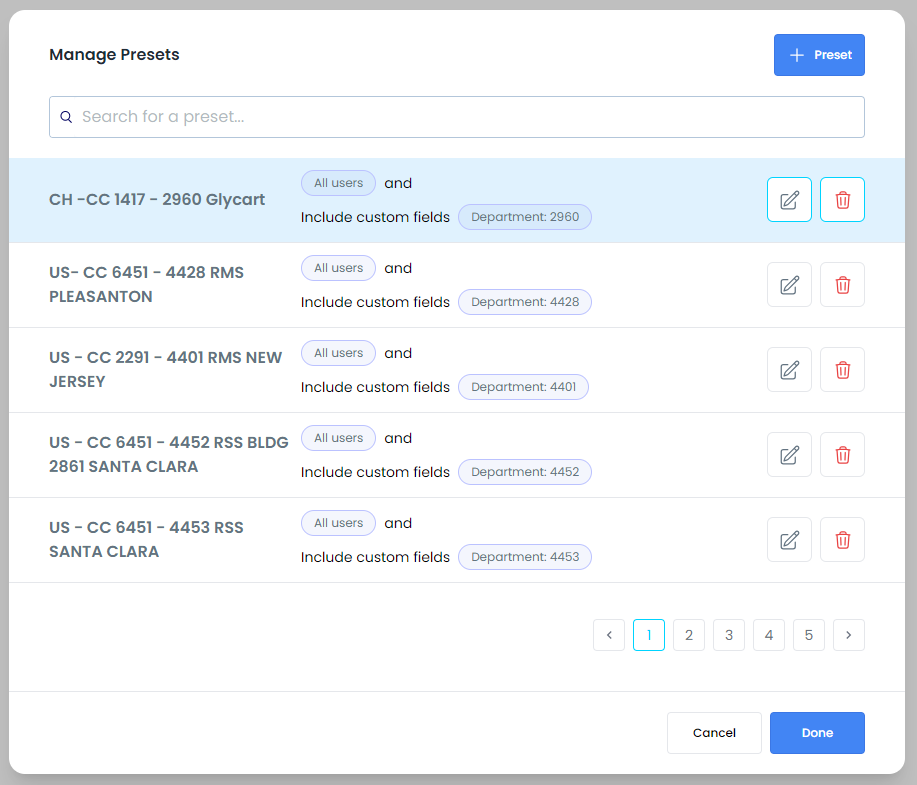
Managing Presets from Dialog Box
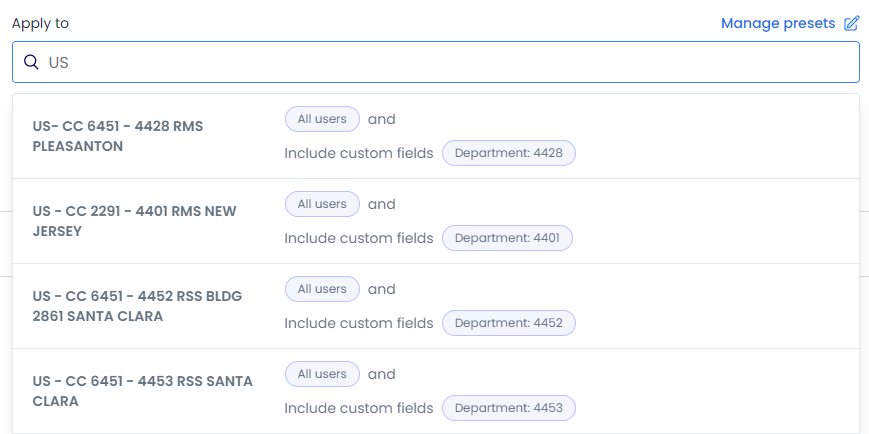
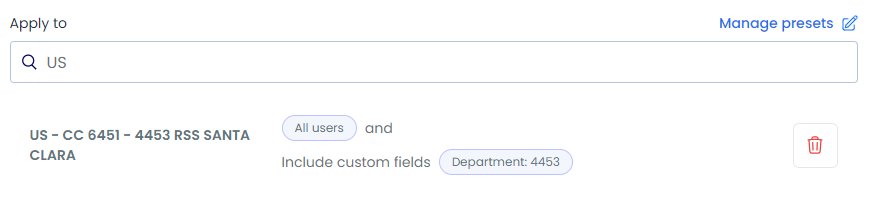
Presets can also be managed from within the editing of a buyer permission, punchout detail, or category supplier config by selecting Manage presets next to the Apply to field.
To manage presets from the Manage Presets dialog box:
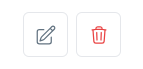
- Click the Edit icon in a row to modify a preset
- Click the Delete icon in a row to permanently delete a preset
- Click + Preset to create additional presets
Applying Presets
When editing a buyer permission, punchout detail, or category supplier config, the Apply to field is where a preset can be searched for and selected. The rule will then apply to the users defined in that preset.
Different rule types behave differently:
- Buyer permissions: Restrict access for preset users
- Punchout details: Enable preset users to see supplier products
- Category supplier configs: Control supplier visibility for preset users
Interactive Tutorial
Learn how to create and manage presets effectively to streamline user access control and permission management.
- Summary
- Creating Presets
- Configuring Regions
- Adding Custom Fields
- Common Examples
- All Users of a Department
- All Users of Several Departments
- Specific Users
- Specific Users of a Department
- All Users of Specific Delivery Addresses/Locations
- Managing Presets
- Managing Presets from the Presets Page
- Managing Presets from Dialog Box
- Applying Presets
- Interactive Tutorial